This spring, I had the privilege of speaking at Spiritual Canada’s PEACE 2025 conference. I delivered a workshop focused on helping holistic and spiritual entrepreneurs bring their businesses online. The energy in the room was fantastic. I was struck by the attendees’ curiosity for every facet of building a digital presence, but one topic sparked a particularly lively discussion: creating video content.
After my talk, a young entrepreneur who provides coaching over Zoom approached me. She was passionate and knowledgeable, but she had a technical hurdle that was clearly a source of frustration. “I love connecting with my clients,” she said, “but what can I do about the glare on my glasses. How do you prevent it?”
Her question hit home. As a lifelong glasses-wearer—I’ve had them since long before the internet was a household utility—I know this frustration intimately. I’ve been in countless video meetings, distracted by the distracting white rectangles on my own lenses. My eyes would dart to my own video feed, checking the reflection, which of course, pulled me out of the actual conversation. At the same time, I’d find myself looking at colleagues on the call who appeared to have glowing “robot eyes.” It’s a subtle thing, but it’s a barrier. It pulls focus from what really matters: the human connection you’re trying to make.
The good news is that you’re not doing anything wrong. The problem isn’t you; it’s a design challenge. And it’s one you can solve.
Why Your Webcam Creates Glare on Your Glasses
The devices we rely on—laptops, phones, and tablets—are marvels of multipurpose design. But for those of us with glasses, their all-in-one construction creates the perfect storm for reflections.
Picture your setup. Your device’s camera is a tiny lens positioned right next to its screen. When you sit in front of it for a video call, the screen itself becomes a bright, flat light source that’s incredibly close to the camera. Light from the screen travels a very short distance, hits the flat, reflective surface of your glasses, and bounces directly back into the camera lens, which is just inches away.
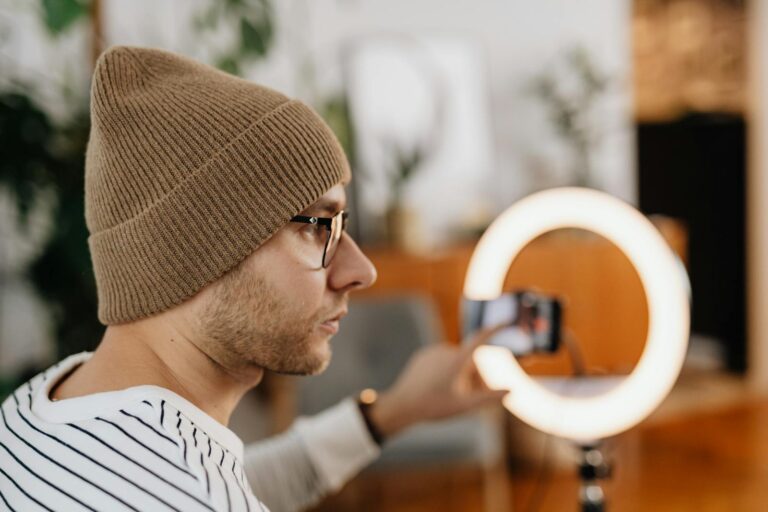
This is why adding a ring light, a popular tool for creators, often makes the problem for glasses-wearers even worse. A ring light encircles the camera, creating a perfect, halo-like reflection that’s impossible to ignore. It’s designed to give you even, direct light, but that’s precisely what causes the issue.
The solution isn’t to ditch your glasses or sit in the dark. It’s to stop relying on your device as your light source and to approach your lighting from a different angle—literally.
The 3 Keys to Glare-Free Video
Three core principles will dramatically reduce, and in most cases completely eliminate, reflections from your glasses. They are the foundation of all good lighting, whether you’re in a Hollywood studio or a home office.
- Distance: Move your light and camera further away from your face.
- Diffusion: Make your light source bigger and softer.
- Angle: Position your light strategically to control reflections.
Let’s break down how to apply each one.
1. Get Some Distance
Light intensity falls off dramatically over distance, a principle known as the inverse-square law. It sounds technical, but the concept is simple: if you double the distance from a light source, its intensity drops to just one-quarter of its original strength.
We can use this law of physics to our advantage.
- Use an external webcam. This is the first and most impactful step. A built-in webcam is fixed in place, but an external one, placed on a small tripod on your desk or on top of a separate monitor, immediately creates more distance between you and the camera. You can also use a DSLR camera or a video camera instead of a webcam.
- Use an external light source. Stop using your monitor as your primary light. By moving your main light source even just a few feet away from your camera and your face, you drastically reduce its power to create harsh reflections.
By increasing these distances, the light that reaches you is less intense, and the reflection that bounces back toward the camera is significantly weaker and less noticeable.
2. Soften Your Light Source (Diffusion)
Think about the sun. On a clear, cloudless day, it’s a small, intense point of light in the sky. It creates harsh, well-defined shadows and bright, nasty reflections. But when clouds roll in, they act as a massive natural diffuser, scattering the sunlight to create a soft, even illumination that’s far more flattering.
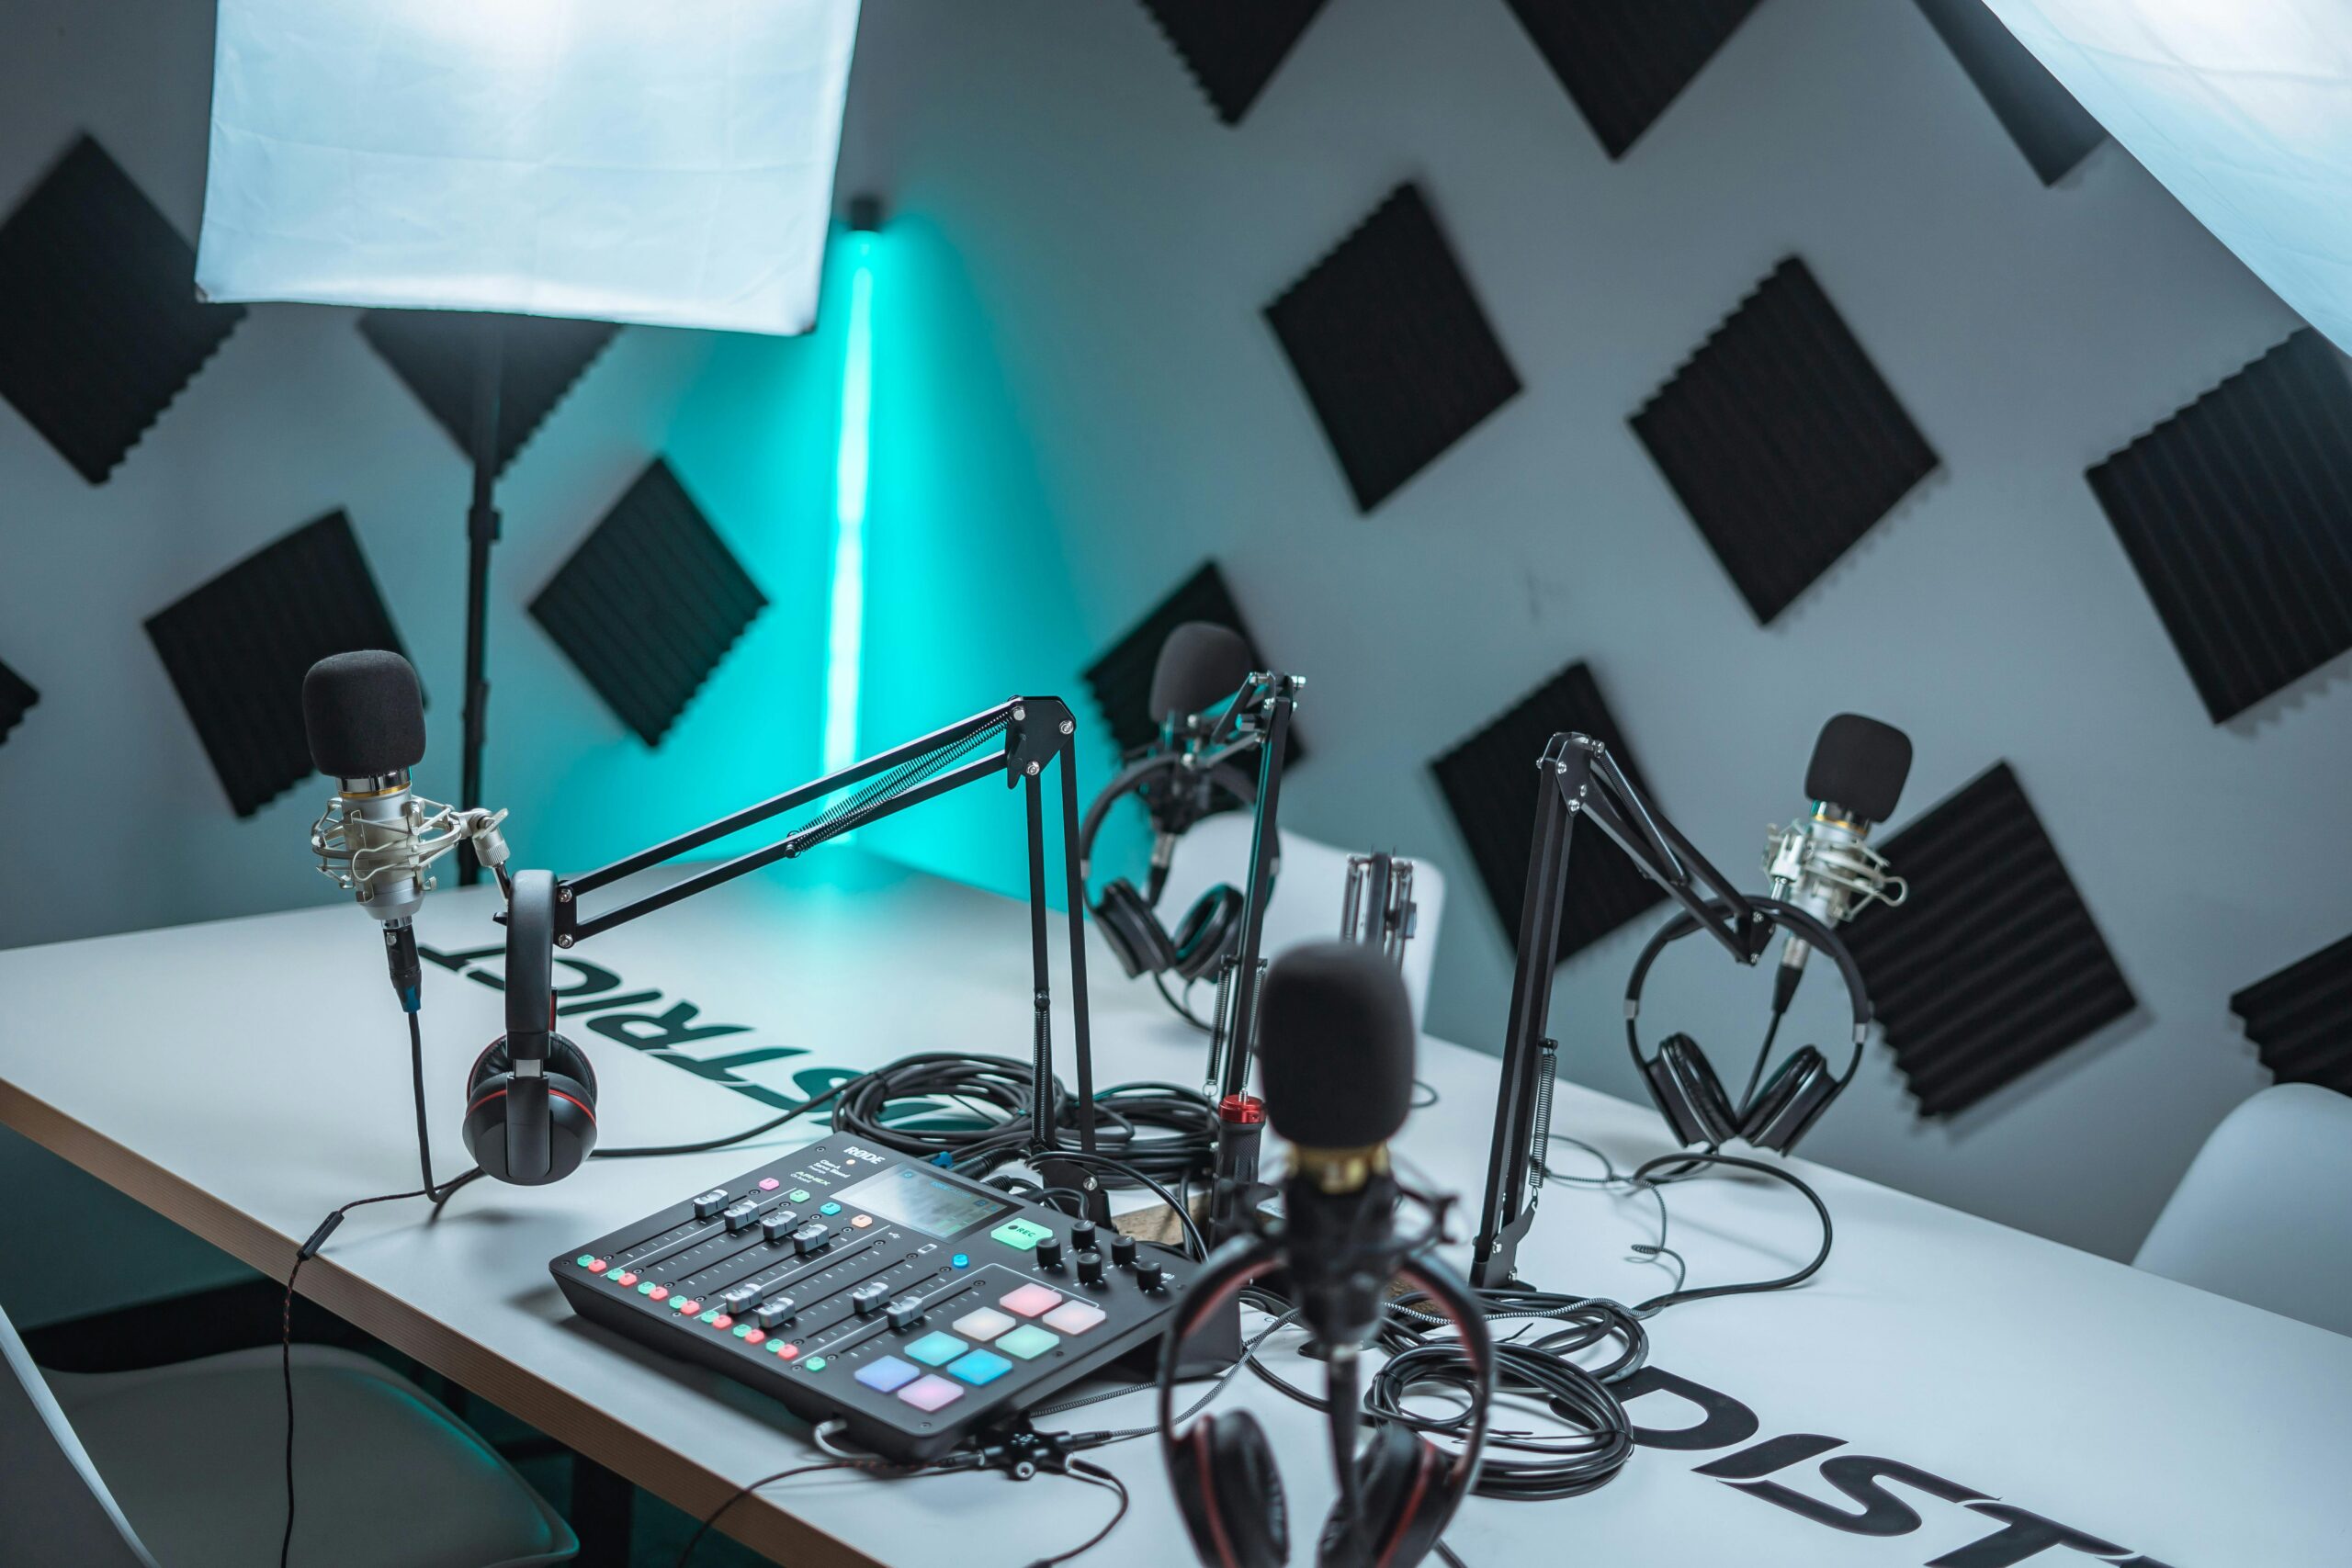
Your goal is to create your own “cloud.” You can achieve this with an LED light panel paired with a softbox and a diffusion sheet.

- LED panels are the modern standard. They are energy-efficient, don’t get hot, and allow you to precisely control brightness and color temperature.
- A softbox is a fabric enclosure that fits over the light. It contains the light and has a reflective interior to bounce it around, mixing it up before it exits the front.
- The diffusion sheet is the white fabric on the front of the softbox. This is your “cloud,” and it’s what turns a small, harsh light into a large, soft source.
On a budget? You don’t need to buy expensive gear to get started. You can achieve a similar effect by taking a bright lamp you already own and pointing it at a large, white wall or a piece of white foam core. The light will bounce off that surface, turning the entire wall into your new, soft light source.
3. Find the Right Angle
With your new soft, diffused light source (in lighting terms, this is now your key light), the final step is positioning. Here, we use another simple law of physics: the angle of incidence equals the angle of reflection. In plain English, light bounces off a surface at the same angle it hits it. If light hits your glasses straight-on, it bounces straight back.
Our goal is to change the angle so the light bounces away from the camera, not into it.
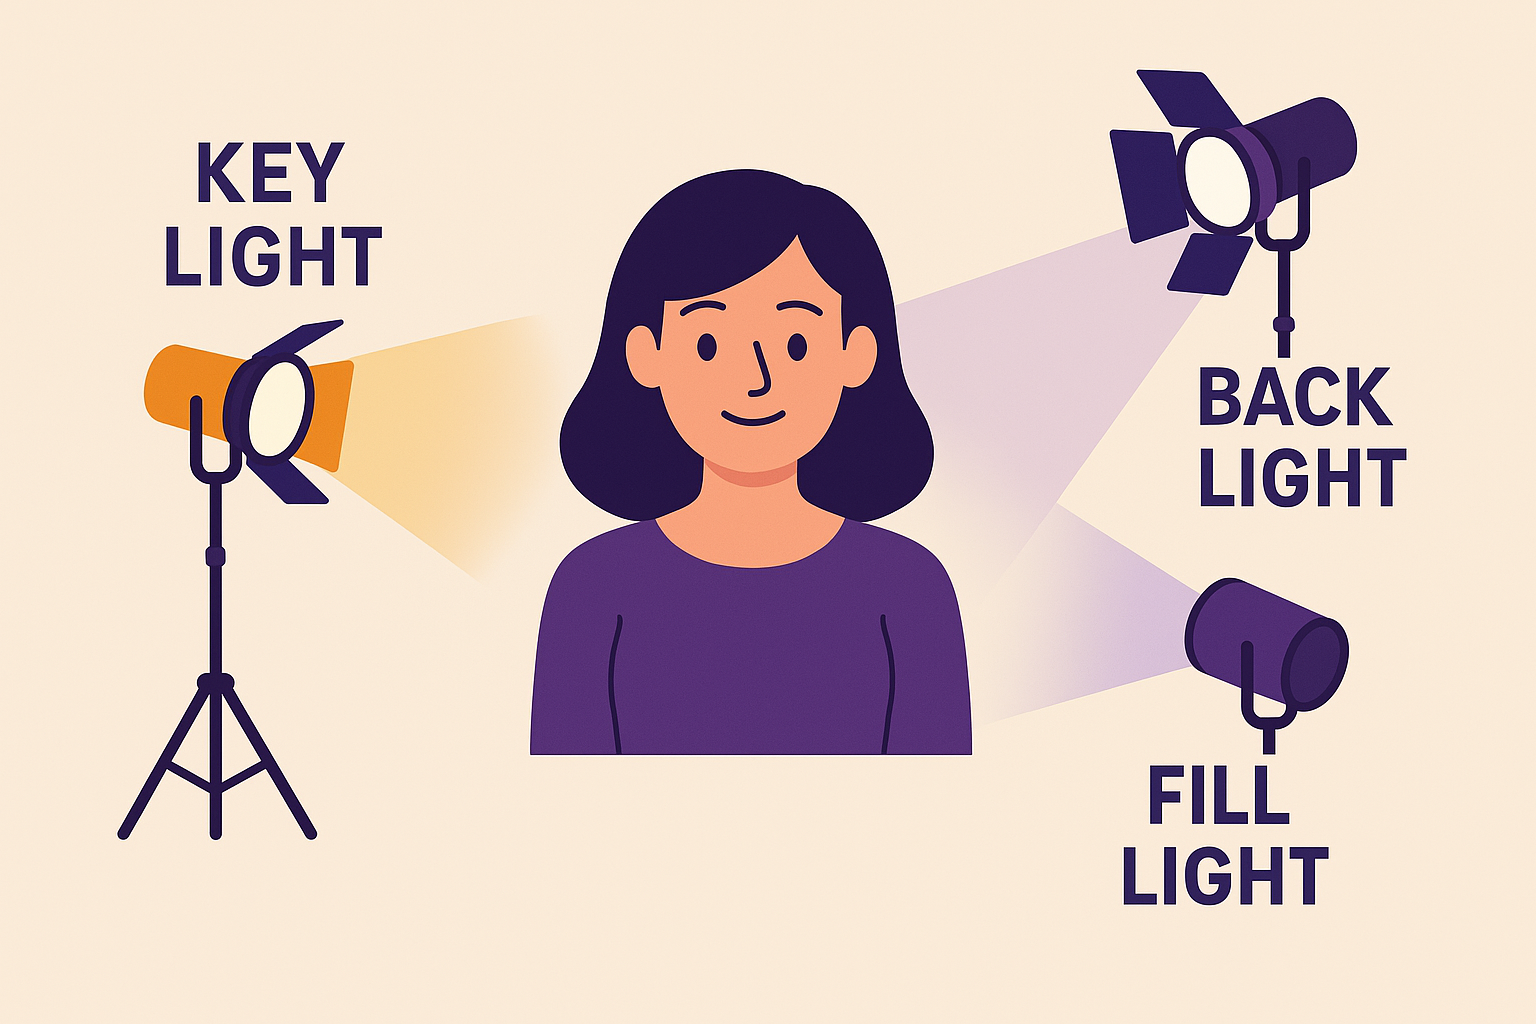
The classic position for a key light is a few feet in front of you, about 30-45 degrees to one side (left or right, your choice), and positioned so it’s pointing down at you from a 15-30 degree angle above your eyeline.
This setup sends any potential reflections off your glasses downward and away from the camera’s line of sight. Your laptop or monitor can then be placed directly in front of you for your notes or to see your audience. Because it’s no longer your primary light, any illumination from the screen will be too weak to create a noticeable glare.
Leveling Up: A Three-Point Lighting Setup
Once you’ve mastered the key light and eliminated glare, you can start adding other lights to create a more polished and professional scene.

- Fill Light: Your key light will create soft shadows on the side of your face opposite it. This is natural, but sometimes you may want to reduce them. A fill light, placed on the opposite side of the key light, “fills in” these shadows. It should always be less intense than your key light to maintain a sense of dimension.
- Back Light: Also called a “rim light” or “hair light,” a back light is placed behind and above you, pointing down at your head and shoulders. This creates a subtle, bright outline that separates you from your background, making the image feel more three-dimensional and preventing you from looking like a cardboard cutout.
- Background Lights: This is where you can get really creative. Use colored LED tubes, smart bulbs, or even just a simple lamp with a shade to add splashes of color, depth, and visual interest to your background. This transforms a boring wall into a dynamic environment that reflects your personality or brand.
Mastering lighting is a journey, but it starts with solving a simple problem. By applying these principles, you can say goodbye to distracting glare and hello to clear, confident video. You’ll not only look better on camera—you’ll feel more present and connected to the people on the other side of the screen.


